Access control and passes
On this page
The front desk checks a client's pass, and the system decides whether to let them in: by membership, by booking, or anyone with a pass. Every entry and every refusal is kept in the log.
1. Choose the entry rules
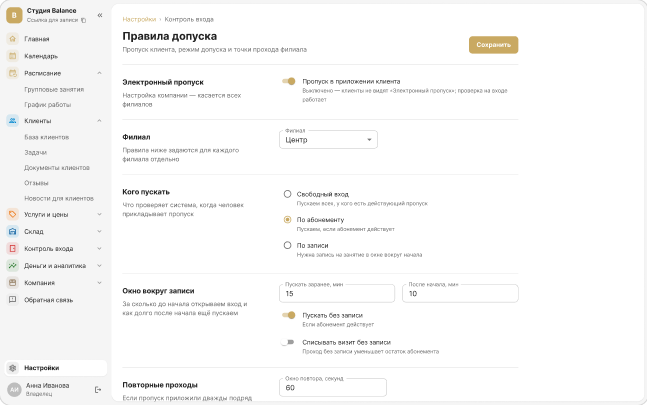
Open Settings → Entry rules and choose a mode for each branch:
- Open entry — anyone with a valid pass gets in.
- By membership — a valid membership or a booking within the window is required.
- By booking — a booking for a session within the window around its start is required. The Let in without a booking switch also lets people in with a valid membership.
By default, entry by booking opens 60 minutes before the start and stays open for 20 minutes after it — for latecomers. You can change the window.
2. Issue a pass to the client
A pass is a code in the client's mobile app, a card or wristband, or a QR code with a PIN. Everything is issued in the client's profile: the card is tapped on a USB reader, and the QR and PIN button shows the QR code, the pass number and the PIN — the client takes a photo of the QR or remembers the number and PIN. The client sees the same QR on the membership page from the SMS link.
To let clients see the pass in the app and on the membership page, turn on Show the pass to clients in the same entry rules.
3. Check clients at the entrance
Open Access control → Entry check. Tap the card on the reader, enter the pass number with the PIN, or find the client by name — the system shows the decision, the membership and the nearest booking. In the SetNow mobile app you can also scan the client's QR code with the camera.
If the system refuses entry, a staff member can let the client in once — that decision goes to the log too.
Until hardware is connected, the “turnstile” is the front desk screen — a phone with a camera or a computer with a reader.
4. Review the check-in log
Access control → Check-in log shows every entry and refusal, including unknown cards, so you can sort out any disputed situation.